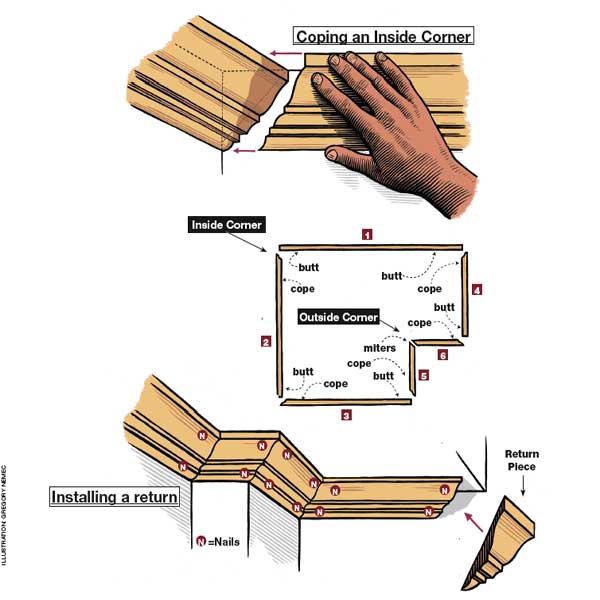
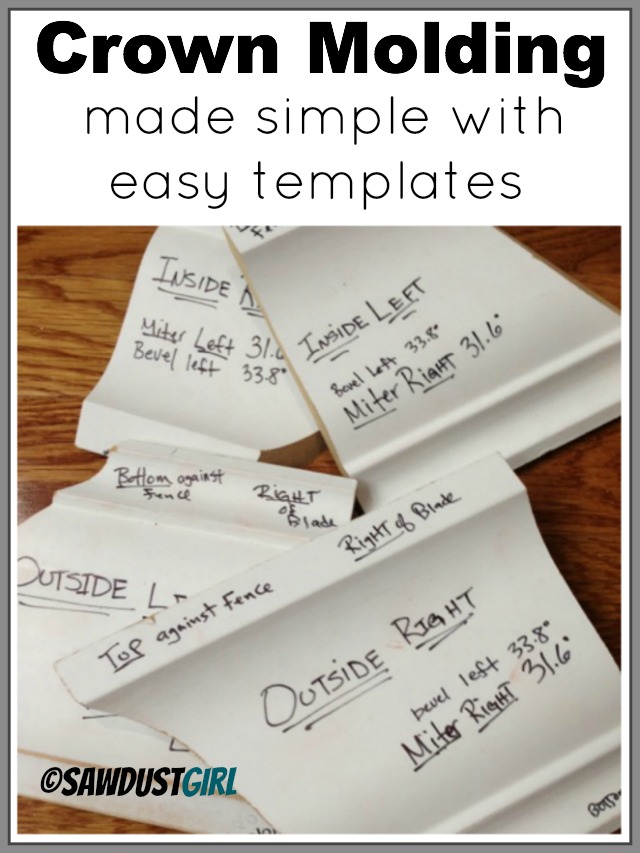
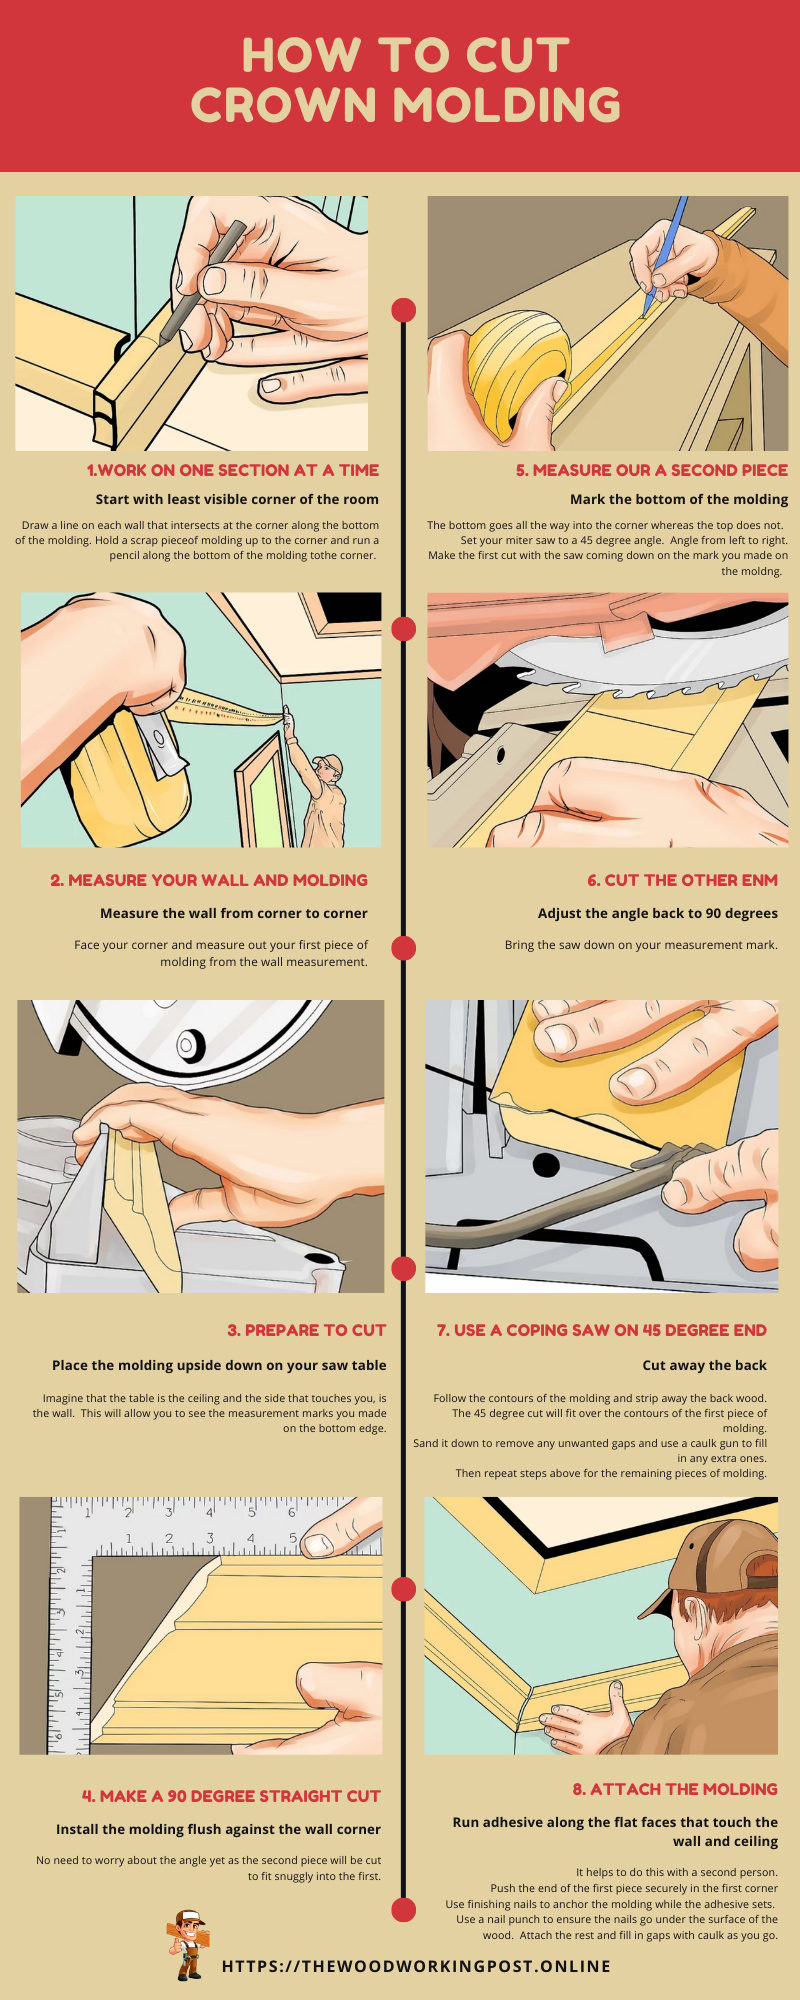
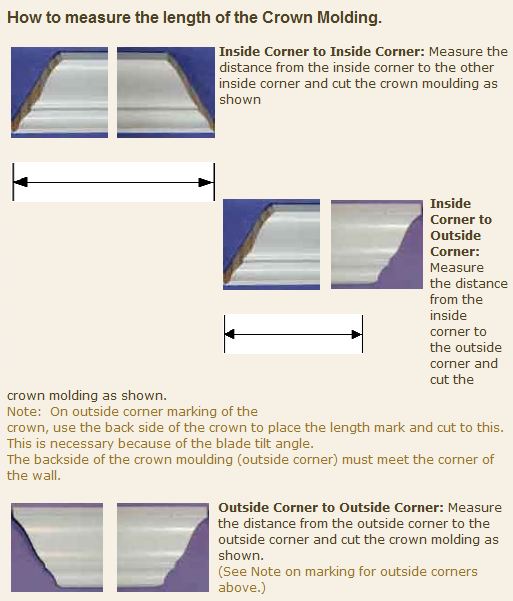
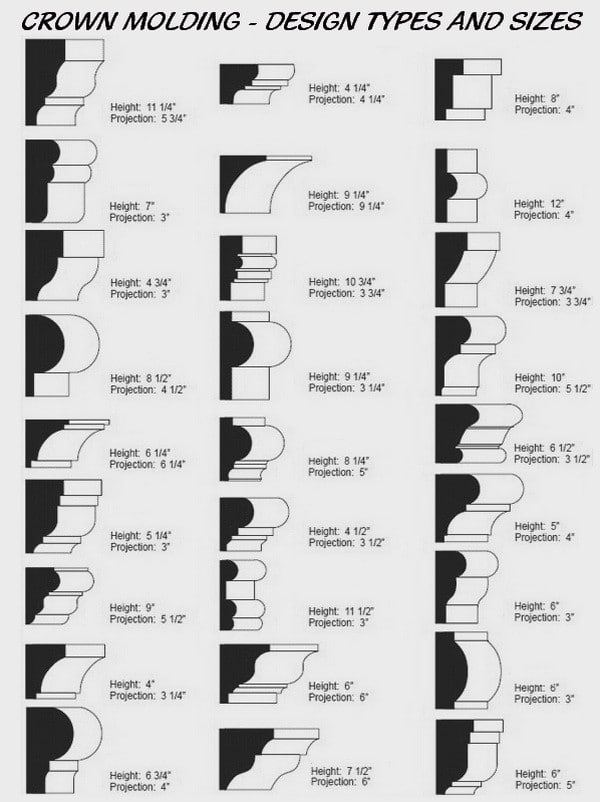
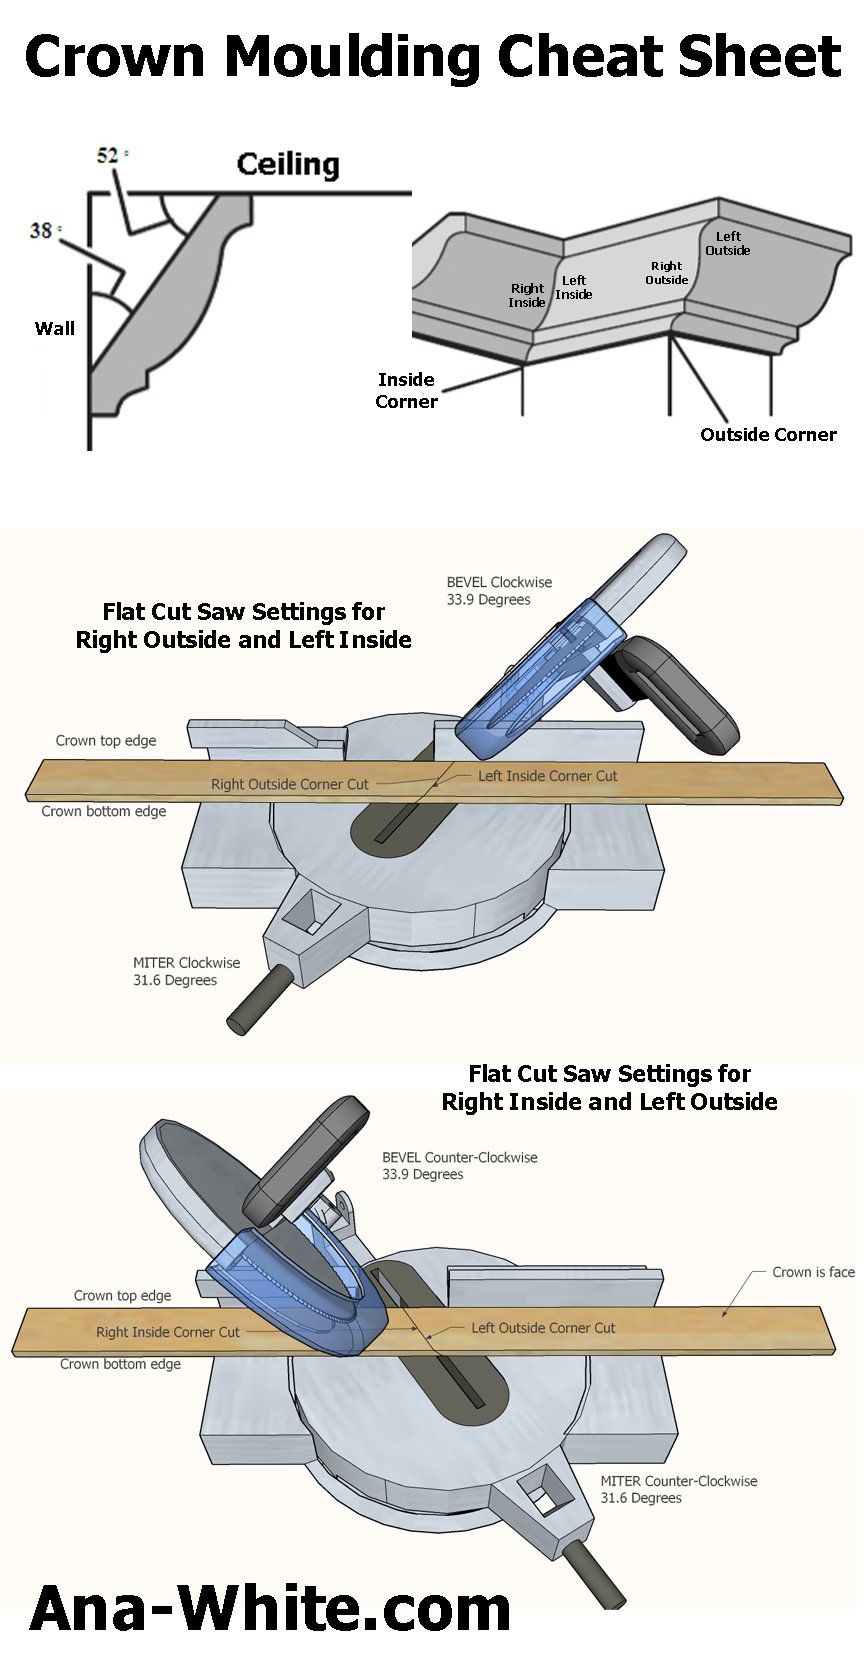
Crown Moulding Cheat Sheet - All measures are given in degrees. If you’re able to open up the ceiling, install. We did a lot of searching and found a lot of information about crown molding but there was always something missing. On the other side, the molding is “coped” to match the profile of its neighbor. Just as with standard crown, backing and blocking are important elements for a solid installation. Set saw miter and bevel. So print this chart and carry it in your truck. Place molding in compound miter saw with broad back surface down flat on saw table (visible decorative surface up). On one side, the molding is cut square and butts tight to the wall.
If you’re able to open up the ceiling, install. On the other side, the molding is “coped” to match the profile of its neighbor. Set saw miter and bevel. We did a lot of searching and found a lot of information about crown molding but there was always something missing. All measures are given in degrees. Just as with standard crown, backing and blocking are important elements for a solid installation. So print this chart and carry it in your truck. Place molding in compound miter saw with broad back surface down flat on saw table (visible decorative surface up). On one side, the molding is cut square and butts tight to the wall.
Just as with standard crown, backing and blocking are important elements for a solid installation. All measures are given in degrees. Set saw miter and bevel. Place molding in compound miter saw with broad back surface down flat on saw table (visible decorative surface up). We did a lot of searching and found a lot of information about crown molding but there was always something missing. On one side, the molding is cut square and butts tight to the wall. So print this chart and carry it in your truck. If you’re able to open up the ceiling, install. On the other side, the molding is “coped” to match the profile of its neighbor.
Crown Molding Cut Cheat Sheet at Ronald Alvarez blog
On the other side, the molding is “coped” to match the profile of its neighbor. If you’re able to open up the ceiling, install. So print this chart and carry it in your truck. All measures are given in degrees. Set saw miter and bevel.

Crown Molding Cut Cheat Sheet at Ronald Alvarez blog
We did a lot of searching and found a lot of information about crown molding but there was always something missing. If you’re able to open up the ceiling, install. Just as with standard crown, backing and blocking are important elements for a solid installation. Set saw miter and bevel. Place molding in compound miter saw with broad back surface.
Crown Molding Cheat Sheet
So print this chart and carry it in your truck. Set saw miter and bevel. Place molding in compound miter saw with broad back surface down flat on saw table (visible decorative surface up). If you’re able to open up the ceiling, install. All measures are given in degrees.

Crown Molding Cheat Sheet
All measures are given in degrees. Just as with standard crown, backing and blocking are important elements for a solid installation. If you’re able to open up the ceiling, install. On the other side, the molding is “coped” to match the profile of its neighbor. We did a lot of searching and found a lot of information about crown molding.

Crown Molding Cheat Sheet
Set saw miter and bevel. Just as with standard crown, backing and blocking are important elements for a solid installation. Place molding in compound miter saw with broad back surface down flat on saw table (visible decorative surface up). On one side, the molding is cut square and butts tight to the wall. If you’re able to open up the.
Crown Molding Cheat Sheet
All measures are given in degrees. We did a lot of searching and found a lot of information about crown molding but there was always something missing. Just as with standard crown, backing and blocking are important elements for a solid installation. Set saw miter and bevel. Place molding in compound miter saw with broad back surface down flat on.
Tips and Tricks for Installing Crown Molding.
We did a lot of searching and found a lot of information about crown molding but there was always something missing. Place molding in compound miter saw with broad back surface down flat on saw table (visible decorative surface up). On one side, the molding is cut square and butts tight to the wall. Set saw miter and bevel. So.
How To Install Crown Molding To Kitchen
Place molding in compound miter saw with broad back surface down flat on saw table (visible decorative surface up). If you’re able to open up the ceiling, install. Set saw miter and bevel. Just as with standard crown, backing and blocking are important elements for a solid installation. We did a lot of searching and found a lot of information.

Crown Molding Cut Cheat Sheet at Ronald Alvarez blog
Set saw miter and bevel. So print this chart and carry it in your truck. Just as with standard crown, backing and blocking are important elements for a solid installation. On one side, the molding is cut square and butts tight to the wall. If you’re able to open up the ceiling, install.
Installing Crown Moulding the Easy Way Ana White
On the other side, the molding is “coped” to match the profile of its neighbor. All measures are given in degrees. Set saw miter and bevel. If you’re able to open up the ceiling, install. On one side, the molding is cut square and butts tight to the wall.
Just As With Standard Crown, Backing And Blocking Are Important Elements For A Solid Installation.
On the other side, the molding is “coped” to match the profile of its neighbor. Set saw miter and bevel. All measures are given in degrees. If you’re able to open up the ceiling, install.
On One Side, The Molding Is Cut Square And Butts Tight To The Wall.
So print this chart and carry it in your truck. We did a lot of searching and found a lot of information about crown molding but there was always something missing. Place molding in compound miter saw with broad back surface down flat on saw table (visible decorative surface up).